E10 | Window to Door Conversion | Ask This Old House
Season 22 Episode 10 | 23m 42sVideo has Closed Captions
Nathan converts a window into a backdoor; The cast discusses house-hunting dealbreakers.
Nathan Gilbert helps a homeowner create a backyard entrance by converting a window into a backdoor; The team discusses what they look for in houses for sale that could be considered deal breakers for homeowners not looking to undertake major repairs or renovations.
Problems with Closed Captions? Closed Captioning Feedback
Problems with Closed Captions? Closed Captioning Feedback
Funding for THIS OLD HOUSE is provided by The Home Depot and Renewal By Andersen.
Support provided by:

E10 | Window to Door Conversion | Ask This Old House
Season 22 Episode 10 | 23m 42sVideo has Closed Captions
Nathan Gilbert helps a homeowner create a backyard entrance by converting a window into a backdoor; The team discusses what they look for in houses for sale that could be considered deal breakers for homeowners not looking to undertake major repairs or renovations.
Problems with Closed Captions? Closed Captioning Feedback
How to Watch Ask This Old House
Ask This Old House is available to stream on pbs.org and the free PBS App, available on iPhone, Apple TV, Android TV, Android smartphones, Amazon Fire TV, Amazon Fire Tablet, Roku, Samsung Smart TV, and Vizio.
Keep Exploring

This Old House Insider Newsletter
Get This Old House exclusive stories, tips, and behind-the-scenes information delivered right to your inbox every month.Providing Support for PBS.org
Learn Moreabout PBS online sponsorship♪ Kevin: On "Ask This Old House," our experts travel across the country to answer questions about your house.
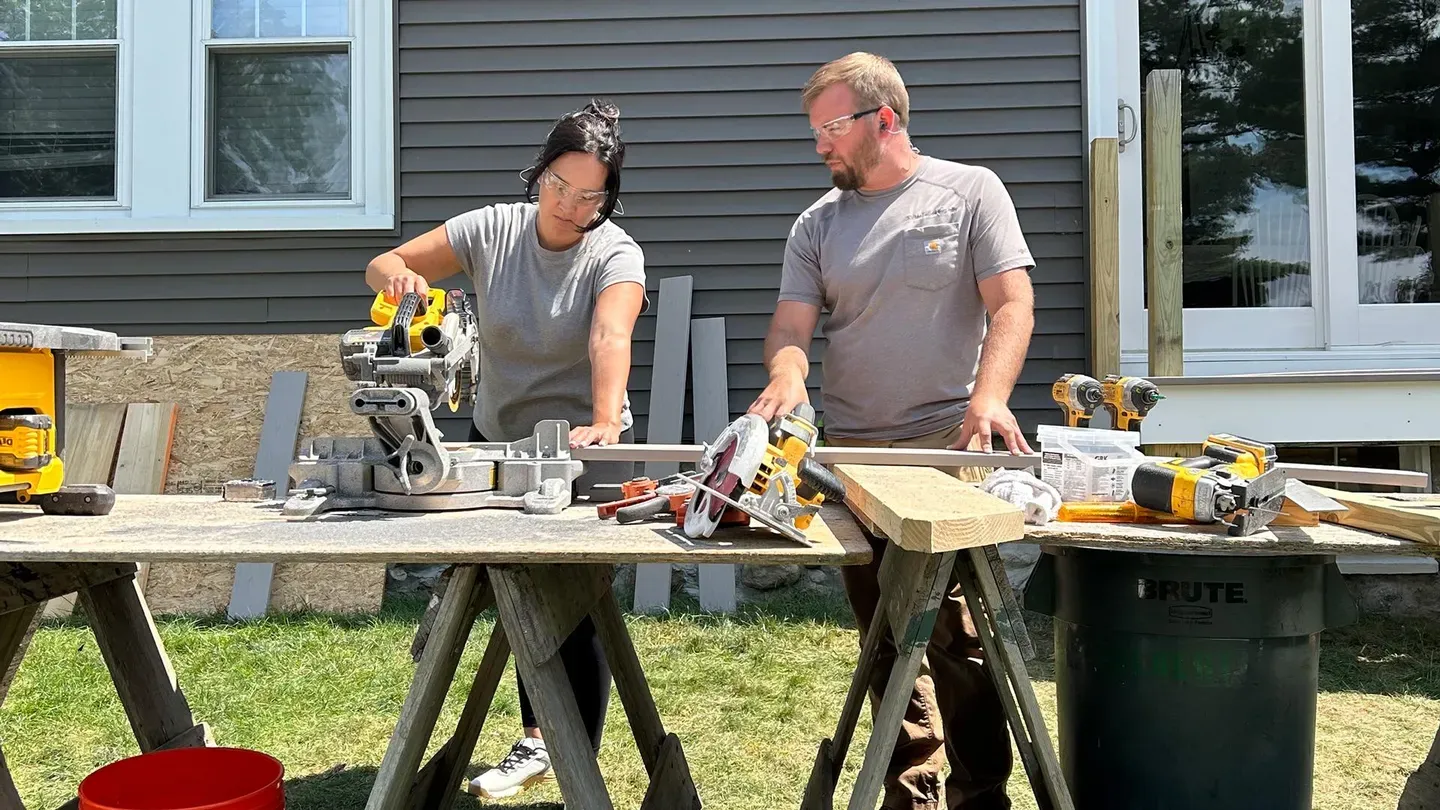
♪ Today, Nathan converts a window to a sliding door, giving a family VIP access to their backyard.
Then any house hunters out there wondering what deal breakers they should be looking for.
The "Ask This Old House" team gives you their list of pitfalls and potential money traps to look for so your next dream house doesn't become a nightmare.
That's all coming up next on "Ask This Old House."
♪ Dave: Good morning, Chris.
Good morning, Stephanie.
Stephanie: Hey, Nathan.
What's going on?
Nathan: Nice to meet you guys.
Chris: Nice to meet you.
Nathan: And who are these guys here?
Stephanie: These are our kids.
This is Jo Jo.
Nathan: Jo Jo.
Stephanie: Benjamin and Owen.
Nathan: Nice to meet you guys.
Chris: Nice to meet you.
Nathan: So you guys wrote me about your back yard?
Chris: Yes.
Nathan: Let's take a look.
Chris: All righty.
Nathan: Oh, wow.
Big fenced in backyard.
Chris: Yes.
Nathan: Very nice.
Chris: We love it out here with the kids.
Nathan: Yeah, I bet.
I bet they run around like crazy out here.
Chris: It's a good space Stephanie: They do.
And it's amazing, but there's no entrance from the inside to the backyard.
Nathan: So you want to add a door back here?
Stephanie: That'll be great.
Nathan: All right.
All right, so I see the bulkhead.
I see some other stuff going on on this side of the house.
And I see these two big windows here.
What's in this room here?
Chris: That's our dining room.
Nathan: Dining room?
So not far off the kitchen.
Stephanie: No.
Nathan: Easy to come in and out.
Stephanie: Yeah.
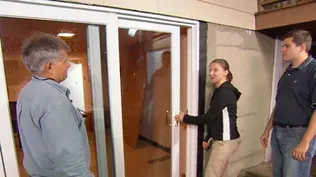
Nathan: Maybe we could take that window out.
I can check inside, make sure there's no roadblocks.
But if there's nothing in our way, take that window out, put in a new slider, new set of stairs down to grade.
I think that would give you that easy access to the backyard.
Chris: That would be great.
Stephanie: Awesome.
Nathan: Let's go inside and take a look.
Chris: All right.
All right, Nate, this is the living room here.
Nathan: This is beautiful.
Really nice.
Chris: Thank you.
This over here is our dining room.
Nathan: Nice.
Okay.
This is a great spot for that door to go.
All right, so first thing, I'm looking for a receptacles on the floor.
I don't see anything.
We'll cautiously approach this.
We'll make sure there's no electrical lines or plumbing in the walls as we go ahead.
But I think this is really a doable project.
It is a lot for us to take on.
You know, it's going to be a few days worth of work.
Do you guys think you have someone that could watch the kids?
Chris: Yeah, I think so.
Chris: All right.
I think we can get it done.
Let's start by taking these windows out.
Chris: All right.
Nathan: All right.
All right, we're going to try and pull these windows out really gently, just in case you want to reuse them somewhere else.
To do that, I'm going to score the paint around these window stops.
Okay.
All right, now grab one end and then pull out and away from the window.
Stephanie: And away from the window?
Nathan: Out and away.
Yep.
There you go.
All right, so it looks like we're getting hung up inside here, so what I'm going to do is pop these window sashes out.
And that'll give us a little more flex on the frame.
Now that we have the window out, we can remove the trim.
I'm going to score the edges with a knife so the paint on the wall doesn't chip off when we start removing.
Hold, please.
Now we're ready to remove your tongue and groove paneling down here, so I'm gonna pull one off.
You see, you got some wallpaper behind there.
That's pretty cool.
[ Whirring ] Now we can cut away the framing from the old rough opening so we can get back to the studs.
So let's take a look at what we're working with here.
Your house is balloon framed, so we have this stud going all the way down to that plate, coming up, and going through.
And then you have these headers that they put in to create the rough opening for the windows.
And we would have liked to have seen a header go all the way across, but you don't have that, so we'll have to put one in.
We'll put some jack studs in, and then we can put the door in.
Stephanie: That's great.
[ Whirring ] ♪ Nathan: Nice job.
♪ ♪ ♪ All right, here's the door that I picked up for you.
It is a sliding glass patio door.
It's vinyl.
It's really nice.
Low maintenance, easy to take care of.
Nice insulated glass.
This unit I bought fully assembled so we don't have to put anything together.
You can buy it broken down if you want to.
If you were working by yourself, you could assemble the frame and then put the glass sliders in.
But I got it all together.
It is really heavy.
That's probably the one downside to it.
So, in the meantime, I built this temporary deck that'll help us get it up and then put it in from the outside, and then we can finish it off.
Chris: Awesome.
Stephanie: Thank you so much.
Jo Jo: Thank you so much.
Nathan: You're welcome.
[ Laughs ] Ready to put this header in.
All right.
Right up to the top, as tight as we can get it.
And then we're going to go against this sheathing.
[ Drill whirring ] ♪ ♪ This header will transfer the load from the second floor, around the door, and down to the foundation.
♪ ♪ ♪ ♪ All right, so if you want to start stitching these up with those threes, eight a side.
♪ I'm going to put this piece of pine in where the sub-floor should have been to help the door finish at the right height.
All right, so now we're ready to put our pan in.
It'll be nice.
And if any water gets underneath the doors, we'll try and redirect it back out.
We're going to use this self adhesive membrane to make our pan.
We're going to cut it about four inches longer on either end.
So we'll roll it out, cut it long, and then we'll peel the back off.
We'll work it in and work it all the way along.
What we'll do is we'll keep pulling.
If you want to pull that, I'll direct it.
Chris: Yep.
All you.
Nathan: All right.
Just bring that up.
All right, now we're going to take our hands, and we're going to really work it in there.
Roll that front.
If we need to, we can trim that little bit hanging.
Chris: Okay.
Nathan: We're going to put a bead of sealant to create a dam on the back side.
Push a door in.
It'll be nice and water resistant.
Chris: Great.
All right.
Here we go.
Shimmy it.
Just lean it up.
And then take your foot and just kind of push that.
Just trying to get it plumbed a little bit, but we'll fine tune it.
♪ ♪ [ Whirring] ♪ ♪ Now we can add flashing to the outside of the door to prevent water from getting inside, causing rot.
We will start with the sides and then do the top.
Making sure that the top flashing overlaps the sides as an extra layer of protection against water infiltration.
♪ ♪ ♪ Stephanie: Oh, wow.
Nathan: Not bad for a day's work, huh?
Stephanie: It's amazing.
Thank you.
Nathan: Give it a try.
Stephanie: Okay.
Looks and works great.
Nathan: Well, we still got some more work ahead of us, right?
So I'll be back tomorrow morning and start working on the footers.
Overnight, I'm going to take that sheet of plywood.
I'm going to flip it up and screw it off so the kids don't run out the door.
Chris: Okay.
Nathan: We can also lock and take the key away.
I think all we do is a nice clean up, and we can call it a day.
Chris: Awesome.
Stephanie: Great.
Chris: Thanks again.
Nathan: Yeah.
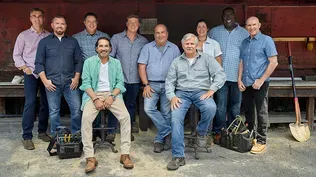
Kevin: Look at this brain trust here, huh?
The hourly rate on this group alone.
So y'all guys know that we get a lot of e-mails from homeowners who are thinking of buying a house, which is a nerve wracking process for a lot of people.
And they're always wondering, all right, I'm not going to do a lot of renovations.
I just want to know if I should buy it or not.
What are the red flags that would cause it to be a deal breaker, from your guys eyes?
The things that cause you concern or say, "Mm, think twice."
Anybody got a -- Mark: Well, one of the things, Kevin, that's going on all over the country, in every hot market, is people have to skip their home inspection.
So they have to do their own, and they miss a lot.
Kevin: That is the professional helping out a novice.
And to think that they would forego that should cause some concern.
Tom: Well, like Mark said, but they don't have to skip it.
They're skipping it because they don't want to lose that house, and they're over overbidding on sometimes the cost of the house.
Kevin: Tough market right now, but what are you looking for when you -- Tom: When I look at a house, when I get out of the truck and I'm looking at a house, I look for straight lines.
I look at the roof to see if it's got a little dip in it, and I look at the walls to see if they're crooked.
And I look at the windows, the condition of the windows.
I look at the grade around it.
Is the water coming into the building, or is it going to be going away from the building?
And if I get inside, then I look at the foundation.
If I see some hairline cracks this way, that's not a problem.
But let's say if it's a block foundation and there's a big crack this way, that could be a problem both with the outside grading and inside, and that can be an expensive fix.
Kevin: So when you look at those things, Tommy, are you thinking, okay, that's going to cost me this, that's going to cost me that, but is there anything on that list that says run away?
Tom: A lot of people buy a house with the idea that they're just going to put paint and paper into the house, or maybe paint the kitchen cabinets as opposed to change the kitchen cabinets.
But if they have to renovate the bathroom, they have to do major wiring, all that kind of stuff, it can make a big difference.
Kevin: Okay, good.
Who's -- Mauro, what are you eyeballing?
Mauro: Well, when I'm going to look for a painting project, a couple of things that I check first of everything.
How old is that house, and how old is that paint job?
Kevin: When you look at a paint job, can you estimate how old it is?
Can you say five years ago.
10 years ago.
Mauro: That's 10 years ago, that's 20 years ago.
And that goes up.
Kevin: Right.
Mauro: So the problem is, if a house was built before 1978, you're going to assume they have lead paint on it.
Kevin: Right.
Mauro: And if we have to paint that house, it's going to be a huge amount of work, preparation, protecting everything, protecting the floor, the homeowners, doors, windows, and the neighbors.
Tom: And you.
Mauro: And myself.
And the boys, everybody.
And the numbers for a regular paint job that doesn't have lead paint, that's this much.
For lead paint, it's this big.
Kevin: Right.
Richard: So in my world, in the plumbing world, you know, you get miles and miles of water piping inside of any building, and any leak is a catastrophe.
So there's just some stuff you'd want to look for.
You know, in any building back in the earliest part of the 20th century, it might have had threaded brass, and that was just threaded together with fittings.
In the war era, they went to galvanized.
This was metal with a special galvanized treating.
Either one of those where the threads are can become absolutely brittle from electrolysis.
So any of the old piping should be a caution.
Polybutylene was the wonder product in the '70s, and it was proven to be a failure.
And so you should worry about that.
Kevin: And what failed, Richard?
The pipe itself?
Richard: Well, it was both.
It was linear expansion on the pipe, but it was also the connections.
You know, it's a tricky thing to make metal to plastic connection Kevin: And to make it last for years.
Richard: Correct, and so the modern PEX systems are terrific, and the connections are really good.
The other thing is, on regular copper, there's one call out I want to mention, and that is you can tell the thickness of copper pipe by its color coding.
So this is red, and this is blue.
And this is the grade or sidewall thickness.
So right here.
So this is the thicker one, the blue or the "L".
And you can see that it's very thin.
Now, the thin by itself is not a problem.
But if you had electrolysis from the loose ground or something like that, you can pit corrode in that thin wall.
Kevin: If you see the thinner wall copper, are you assuming you have to replace it, or is it just something -- Richard: Not assuming, but it still has to be a cautionary tale that you're going to say, "Look, if I'm going to now do a bathroom remodel somewhere in the building, I'm going to replace all that thin gauge pipe when I'm doing it," because it's cheaper to just do it at that time.
You just want to eliminate the amount of risk.
You want to reduce your risk as much as possible.
Kevin: That's good to know.
Ross: Some other things that come to mind.
Maybe not deal breakers, but the age of the mechanical and plumbing equipment, you know?
So most equipment has a rating plate on it.
So you have the model number, the serial number, and the date of manufacture.
Kevin: That's always there.
Ross: That's there.
Yeah.
And so with that date, you can compare that to what the actual life of that piece of equipment is.
So if you know you have a water heater that's 9 or 10 years old, you know, based on the date of manufacture, it's probably going to need to be replaced in the future.
Kevin: Maybe not a deal breaker if you've got old equipment, but at least now you go into it knowing I've got an expense in my near term future.
Ross: That's right.
Kevin: What about when you walk up to a house, Ross, and you see solar because a lot of houses have it now, does that cause you concern, or does that make you happy?
Ross: The one thing I would caution is, how was that solar financed?
So is it a lease or a power purchase agreement?
If it's one of those two financing vehicles for that solar, then I'd be concerned about reading the fine print on that and understanding the terms that you're signing when you when sign P&S.
Kevin: Previous homeowner buys it outright, no concern.
Those two other deals, you may have a partner... Ross: That's right Kevin: ...in your roof.
So just know what it is.
Ross: Financing partner in that case.
Yeah.
Kevin: Gotcha.
Ross: Exactly right.
Kevin: Okay.
Who's -- Heath: So the first thing I want people to be aware of is that, don't panic on the age of the house necessarily.
Our electrical codes change constantly.
You know, we're updating them with new materials, new methods, better and safer ways.
So that doesn't mean that the stuff you have is bad or unsafe or was installed properly.
It was probably perfectly fine when it was installed and is still probably good.
But that being said, you do want to look for a couple of things.
If you have a fuse box service with the actual screw-in fuses and knob and tube wiring, that's a big red flag.
A lot of places won't even insure you with the knob and tube wiring still in the house.
So you're looking at removing all of that and rewiring.
Tom: And you can't insulate the house either if it has knob and tube.
Heath: No.
Kevin: Uh, you?
Mark: So in my business, the chimneys, they get missed a lot.
If you don't have that professional inspection, you really don't know what you're looking for.
A couple things that I've been seeing for the last couple years is I've noticed that, again, because they missed that in the inspection, the chimney starts to lean out, which means you have to take it down to where it starts to lean.
Again, you're putting up staging now.
Now you have to re-lay the brick.
You have to find the brick to match it.
Just a multitude of problems that come along with missing that on your inspection.
Kevin: Gotcha.
Tom: So it can be scary in some ways, but not so scary in other ways.
Houses have been around a long time.
Richard: But even the worst of these "deal breakers" might not be enough to stop you from buying that dream house if you finally find it.
Tom: Absolutely.
Richard: You just got to have a budget set aside for it.
A rainy day fund.
Tom: It doesn't always have to be done right now either.
Kevin: Right.
All right.
Well, thank you all.
So with that did that cost me?
250 bucks an hour.
$175 an hour.
[ Laughter ] Nathan: Well, it's a new day.
We're heading back to the job site.
Mark McCullough and his team were able to dig the footers.
We got them inspected with the building inspector, and then we placed our concrete, so we're all signed off there, and we're ready to start framing on top of that.
For a project like this, you need to pull a permit.
In this case, I pulled the permit for the homeowners, but they could have pulled it themselves.
It's important to check in with the building department and pull a permit so they know that the work is going on.
It's like a layer of protection, not only for myself, but for the homeowners, as well.
When you pull the permit, the building inspector will tell you what they want to inspect.
In our case, it's the footers, the framing, and the final inspection to make sure everything's done right.
They're going to check to make sure that everything is done to code and is done safe.
Nathan: Morning, guys.
Chris: Hey.
Nathan: How's it going?
Chris: Wow.
It looks great.
Nathan: Yeah, yeah, we're really coming along here.
So just to recap what we've been working on.
We have the trim inside done.
We got the siding almost done.
But we framed this deck like any other deck that we would frame.
Big, beefy post off of our footers that were poured and inspected.
The framing is signed off by the inspector.
We have our joists here to support the decking, rim joists, posts for our railing system.
These are roughed in.
We'll cut them to the height we need.
We got our stringers that are going to support our risers and our treads down to our nice landing.
I think that we can knock this out today.
Chris: Awesome.
Nathan: You guys ready to get started?
Chris: Yeah.
Let's go.
Nathan: All right.
Let's start by finishing off the siding.
So what are you going to do is drop it into this J-channel.
Chris: Okay.
Nathan: Cool.
Perfect.
Here, take this vinyl siding removal tool.
It's great for taking it apart, but it's even better for putting it back together.
Come pull like six inches down here.
Yeah, pull there and pull down really hard and then push.
There you go.
Perfect.
Sometimes it's really nice.
You can just get it.
Chris: When things just go smoothly.
Nathan: Yeah.
Chris: That's not in my repertoire.
Nathan: All right, so I picked up some of this permanent adhesive flashing tape.
It's really good for doors and windows, but it's even better for decks, in my opinion.
A lot of people are putting it in now.
Really easy to work with.
It's almost like duct tape.
Easy to rip the length.
But the one difference is it has this paper backer on it that you need to peel off.
What we're going to do is we're going to cover anything flat on the deck before we put our decking down.
And why we're going to do that is a great feature that this has is when we put the decking screw through, this is going to self seal around that, preventing the water from getting inside that joist.
And in turn, over time, splitting that joist.
So we're going to try and make this deck last as long as we can.
We'll switch to the wide stuff for the rim joists, and then we'll cover the stringers, as well.
Stephanie: All right.
Nathan: Now we can add boards around all the pressure treated framing to give it a good clean look.
I got 80 and 15/16.
♪ Now we're ready for some composite decking.
This is really the go to these days.
Easy to maintain, pressure wash it once a year.
And the best thing about this is it matches the color on the front of your deck, so... Chris: Awesome.
Nathan: ...it'll blend right in.
Very easy to install.
♪ I'll need to notch a few deck boards, which I can do with a jig saw.
This will help the boards fit nicely around the post.
♪ ♪ All right.
All set.
Chris: All righty.
Nathan: Now it's time for post sleeves and railings.
Chris: Cool.
Stephanie: Let's do it.
Nathan: So kind of come in low.
Chris: Okay.
Nathan: And then we have our kit.
This has our balusters.
Upper rail and lower rail.
♪ Nice.
All right, guys, what do you think?
Chris: This is amazing.
Thank you.
Stephanie: Let's test it out with the kids.
Come on, guys, let's test it out.
Do you guys like it?
Chris: Wow.
Nathan: Nice job.
Just a little bit of homework.
Some new seed on top of this loom out here.
Inside, a little bit of caulking and painting just to tighten things up, and you're good to go.
Chris: Awesome.
I think we can handle that.
Nathan: All right.
Stephanie: Thank you so much for coming out.
We really appreciate it.
Nathan: You're welcome.
Any time.
If you've got questions, we'd love to hear from you.
So keep them coming.
Until next time, I'm Nathan Gilbert for "Ask This Old House."
♪ ♪ Mauro: Pinky, let's go.
We got a lot of work to do.
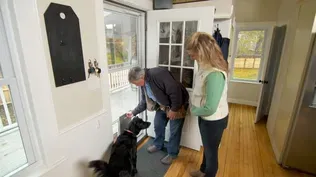
Kevin: Next time on "Ask This Old House"... Mauro makes a friend as he takes a garage from graffiti to glam.
♪ Then Ross gives us a primer on radon testing.
Then, in preparation for a new addition, Nathan helps a family organize their nursery closet.
Woman: Thank you so much.
It's gonna be so much more functional for this room now.
Kevin: All that on "Ask This Old House."


Support for PBS provided by:
Funding for THIS OLD HOUSE is provided by The Home Depot and Renewal By Andersen.